Key Takeaways
A good replacement starts with fitment, not just appearance. Compare the year, body style, bumper position, material, condition, and total installed cost before choosing among PT Cruiser bumpers for sale.
- Confirm the PT Cruiser’s model year, body style, trim, and bumper position.
- Compare OEM, direct-fit aftermarket, custom-style, and used bumpers carefully.
- Check material, finish, paint requirements, mounting tabs, and included hardware.
- Calculate preparation, painting, shipping, and installation costs—not only the listing price.
- Use photos, return terms, and fitment confirmation to reduce buying risk.
Match the bumper to your PT Cruiser
The right bumper should match more than the vehicle name in a listing. Model year, body style, front or rear position, trim details, and mounting design can all affect fit. Take a few minutes to identify the original part before comparing prices, because a cheap panel that needs major modification is rarely a bargain.
Confirm the model year and body style
Start with the vehicle identification number, registration details, or the build information on the car. PT Cruiser bumpers can vary by model year and body configuration, while a listing may use broad wording that hides those differences. Note whether your vehicle is a standard four-door model, convertible, or another body style, and save clear photographs of the existing bumper.
The VIN is especially useful when a seller’s catalog uses overlapping year ranges. It can help confirm the exact vehicle identity before you commit to a part. If the seller cannot explain which years and body styles the bumper covers, treat that uncertainty as a reason to keep looking.
Choose between front and rear bumpers
Front and rear bumpers have different shapes, attachment points, and surrounding trim. A front replacement may need openings for fog lights, a grille arrangement, or other front-end details, while a rear panel may need to accommodate reflectors or a different lower contour. Read the title and description closely rather than relying on the product photograph alone.
Also check whether the listing is for the bumper cover, the complete bumper assembly, or an overlay that fits over an original panel. Those are very different purchases, both in installation and in final appearance. Ask for clarification before ordering if the description uses terms such as “bumper kit” without explaining what is included.
Check trim, grille, and mounting compatibility
Trim packages can change the look and attachment details around a bumper. Compare the grille opening, fog-light openings, side edges, wheel-well transitions, and any lower valance or garnish on your vehicle with the seller’s photographs. A replacement that matches the central shape may still be wrong around the corners.
Mounting compatibility deserves equal attention. Look for the number and location of tabs, holes, clips, and brackets, and compare them with the damaged part before removing it. Fitment details matter most when a listing uses a generic photograph or covers several versions of the PT Cruiser.
Verify fitment with the seller or manufacturer
Send the seller your model year, body style, trim, bumper position, and VIN details when possible. Include photographs if the car has unusual trim or aftermarket changes. A written fitment confirmation gives you a useful record if the part arrives and does not match the stated application.
A genuine Chrysler PT Cruiser bumper may be the closest route to the vehicle’s original design, but the word “OEM” alone does not remove the need to verify position and year. Ask whether the part is new, used, refurbished, or removed from another vehicle. Those details affect both condition and what you should expect in the box.
Compare the main bumper types
Bumpers for an older vehicle are available through several channels, and each one involves a different compromise. Original parts tend to offer familiar dimensions, while aftermarket pieces may offer lower prices or more styling choices. Used parts can be practical when condition and color are acceptable, but photographs and return terms become especially important.
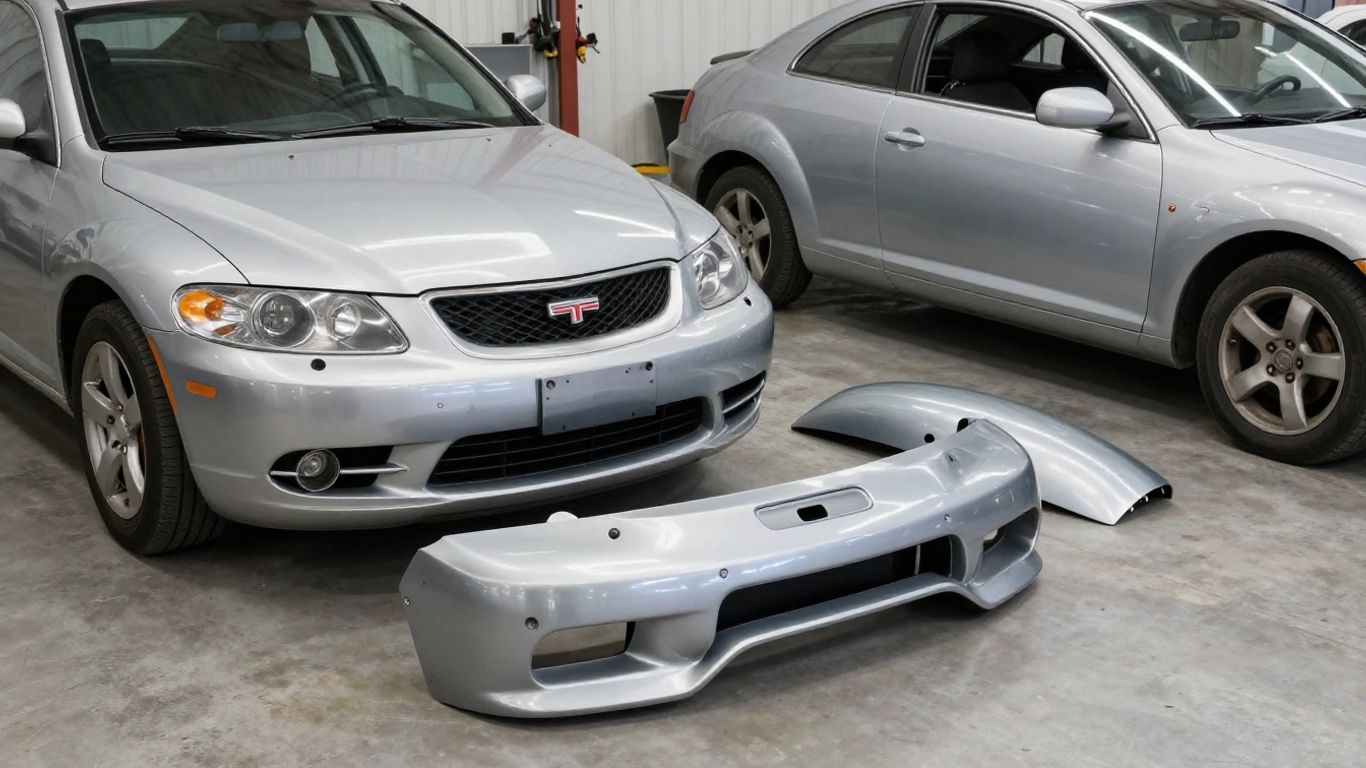
The best choice depends on the purpose of the repair. A daily driver may benefit from a straightforward replacement, while a project car may justify a style-oriented panel that requires extra preparation. Compare the type of part with the amount of work you are prepared to do after it arrives.
OEM replacement bumpers
OEM replacement bumpers are designed around the original vehicle specification. They are appealing when you want the factory shape, familiar mounting points, and a predictable relationship with the surrounding grille and trim. Availability can be limited for an older model, so confirm whether the part is genuinely original, factory surplus, or an aftermarket panel described loosely as OEM-style.
A genuine Chrysler PT Cruiser bumper is also associated in the available product information with impact absorption at the front or rear of the vehicle. That makes it sensible to investigate the complete condition of the bumper system after a collision rather than treating the visible skin as the only relevant part.
Aftermarket direct-fit bumpers
A direct-fit aftermarket bumper is intended to replace the original panel without extensive redesign. That does not always mean it will arrive ready to paint or install, however. Surface preparation, small adjustments, transferred clips, and paint matching may still be necessary.
Read the application notes and inspect the part’s edges before purchase. “Direct fit” should be supported by clear year and body-style coverage, not just a general statement that it fits a PT Cruiser. A seller who supplies measurements or detailed mounting photographs is easier to evaluate than one who provides only a polished studio image.
Custom and aftermarket-style bumpers
Custom and aftermarket-style bumpers change the vehicle’s appearance and may use different openings, contours, or mounting arrangements. They can suit a project car, but the buyer should expect more preparation than with an original-style replacement. Some designs require test fitting, trimming, drilling, or professional bodywork.
A style-oriented part is a poor match for a quick cosmetic repair if the car needs to return to the road immediately. Check whether lights, grilles, mesh, brackets, or other accessories are included. Never assume an accessory shown in the photograph is part of the sale unless the description says so.
Used and recycled bumpers
Used and recycled bumpers can offer the most economical path, especially when the original color is close enough to avoid a full repaint. Their condition varies with storage, removal, sun exposure, and the vehicle from which they came. Ask for photographs of the exterior, back side, corners, and all attachment areas.
Color matching is helpful, but it should not outweigh structural condition. A panel with faded paint and intact tabs may be more useful than a glossy panel with repaired cracks. Confirm whether the seller grades cosmetic flaws and whether the part has been repaired before.
Decide which material and finish you need
Material influences flexibility, repairability, weight, and preparation time. Finish influences how soon the bumper can be installed and how much the paint work may cost. Neither choice is automatically best; the practical answer depends on the damage, the vehicle’s use, and the result you want.
Plastic, polyurethane, and fiberglass options
Plastic bumper covers are common on factory-style replacements and may resemble the original panel. Polyurethane can be flexible and is often used for styling parts, while fiberglass-style panels may be rigid and may require more careful fitting. Treat each description as a starting point and ask about the exact material, because sellers sometimes use broad terms inconsistently.
A flexible material may tolerate minor contact differently from a rigid panel, but it still needs sound mounting points and proper preparation. Fiberglass or other custom-style parts may be a better fit for a project than for someone seeking a quick, factory-like repair. The material should match your expectations for installation as well as appearance.
Primed, painted, and unpainted finishes
A primed bumper is usually prepared for additional finishing, not necessarily ready for installation. An unpainted part may need sanding, adhesion preparation, primer, and color coating, while a painted used bumper may arrive closer to the vehicle’s color but still show age or mismatch. Ask what preparation the seller recommends for that specific material.
Paint code information can help a body shop create a closer match, but age and sun exposure mean the vehicle’s current panels may no longer match the original code perfectly. Budget for blending when a near-invisible result matters. A lower listing price can disappear quickly once preparation and refinishing are included.
Gloss, textured, and smooth surfaces
Surface texture changes how a bumper reflects light and how easily small flaws can be seen. Gloss surfaces show waves, sanding marks, and color differences readily, while textured finishes can disguise minor visual irregularities but may be harder to reproduce during repair. Compare the replacement’s texture with adjacent trim before ordering.
Look at photographs taken from several angles rather than one straight-on image. Reflections can reveal ripples and uneven contours that are difficult to see in a dim or tightly cropped listing photo. If the bumper will be painted, confirm whether the texture is molded into the part or created during refinishing.
When repair is better than replacement
Repair may make sense when the damage is limited to scratches, shallow dents, or a small crack away from the mounting points. Replacement becomes more attractive when the panel is split, badly warped, missing tabs, or distorted around a lamp or grille opening. Get an estimate before deciding, since a repair can involve more labor than expected.
The condition of the hidden structure matters after any meaningful impact. A bumper cover that looks repairable may sit incorrectly if brackets, absorbers, or reinforcement components are bent. Cosmetic repair is appropriate only after the underlying attachment and safety-related parts have been checked.
Evaluate a bumper listing before buying
Online photographs and descriptions are useful, but they do not replace a close inspection. The most revealing evidence is often found at the edges and on the back of the panel, where tabs, cracks, repairs, and distortion show up. Build your questions around the things a front-facing product image cannot prove.
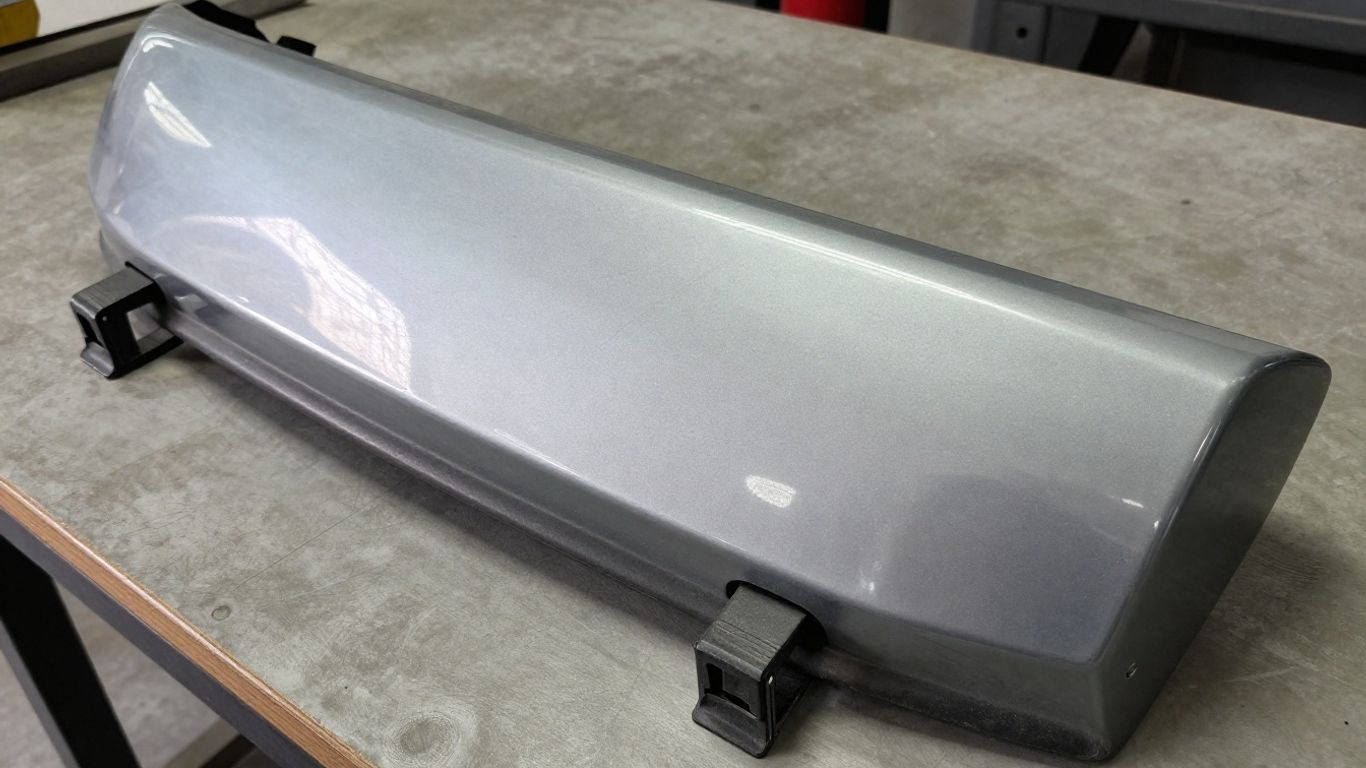
A reliable listing should tell you what is included, what condition the part is in, and which vehicles it fits. If those basics are missing, a low price may simply reflect the uncertainty being transferred to you. Save the listing and the seller’s answers until the part has been installed or accepted.
Review photos for cracks, dents, and warping
Study the corners, lower lip, wheel-well edges, and areas around openings. Look for cracks that have been painted over, dents that change the panel’s contour, and waves caused by heat or poor storage. Ask for current photographs if the listing uses stock images or shows only the bumper’s best side.
A photograph taken at a shallow angle can reveal uneven reflections across the surface. Also check whether the panel is dirty, wet, or partly covered, since those conditions can hide scratches and repaired areas. The more expensive the shipping, the more valuable this inspection becomes before purchase.
Inspect mounting tabs and attachment points
Mounting tabs are among the easiest parts to damage during removal, and they are difficult to judge from a front view. Request close photographs of every corner, rail, hole, clip location, and bracket interface. A seller should identify missing or repaired tabs rather than leaving you to discover them during installation.
If a used bumper has been repaired, ask what repair method was used and whether the area remains flexible. A cosmetic patch may look fine but fail when the panel is pulled into alignment. Compare the attachment layout with your original bumper before assuming the part is interchangeable.
Look for included grilles, brackets, and hardware
Listings often show a bumper with surrounding pieces installed, even when the sale includes only the cover. Confirm whether the grille, fog-light bezels, brackets, clips, absorbers, and other hardware are included. If they are not, price those pieces separately before comparing the listing with a complete assembly.
Write down the exact contents of the package. This simple step prevents confusion over a photograph that includes parts supplied only for illustration. It also helps you order replacement clips and fasteners before the vehicle is taken apart.
Read return policies and fitment guarantees
A return policy should explain the time limit, eligibility, shipping responsibility, and treatment of painted or modified parts. Oversized body panels can be expensive to send back, so a vague policy deserves extra caution. Look for fitment language that explains what happens if the bumper does not match the stated application.
Do not modify, paint, or discard the original part until you have test-fitted the replacement. Photograph the package when it arrives and report shipping damage promptly. These habits preserve your options if the part is wrong or arrives in a condition different from the listing.
Understand PT Cruiser bumper pricing
The advertised price is only one part of the replacement cost. Condition, finish, completeness, shipping distance, and labor can change the final figure substantially. A useful comparison puts similar parts side by side and includes the work required to make each one road-ready.
Factors that affect the purchase price
New original-style panels, used color-matched parts, custom designs, and damaged salvage pieces occupy different price ranges. Availability also matters: a rare trim variation may cost more because fewer suitable panels are being offered. The presence of grilles, brackets, lights, or hardware can make a higher-priced complete assembly cheaper overall.
Use the same questions for every listing so the comparison stays fair. The following categories are a practical way to separate the initial price from the likely finished cost.
| Cost factor | What to check | Why it matters |
|---|---|---|
| Part condition | New, used, repaired, or damaged | Predicts preparation and repair work |
| Completeness | Cover, brackets, grille, clips, or hardware | Reveals extra purchases |
| Finish | Unpainted, primed, or painted | Changes refinishing needs |
| Fitment | Year, body style, trim, and position | Reduces modification risk |
| Delivery | Packaging, distance, and oversized fees | Can materially raise the total |
The table is most useful when you apply it to comparable listings rather than mixing a bare bumper with a complete assembly. A slightly more expensive part may be the better value if it arrives straight, complete, and ready for less labor.
Comparing new, used, and refurbished parts
New parts offer a clean starting point, but their fit and finish still need verification. Used parts may be cheaper and can retain original dimensions, though they may carry paint wear, hidden repairs, or brittle tabs. Refurbished parts sit between those choices, so ask exactly what was repaired and whether refinishing is included.
Consider the vehicle’s role. For a high-mileage daily driver, a sound used bumper can be sensible; for a careful restoration, an original or professionally prepared replacement may better justify its cost. The right comparison is based on total work and expected appearance, not the label alone.
Estimating painting and preparation costs
Ask a body shop or experienced painter what the material needs before applying color. Sanding, adhesion promoter, primer, repair of small imperfections, color matching, clear coat, and blending may all be part of the estimate. A bumper advertised as primed is not necessarily a bumper that needs no additional preparation.
Labor can also vary according to whether the part fits cleanly. Test fitting before paint is wise, particularly for custom or aftermarket-style panels. Painting a part that later requires trimming or reshaping can create avoidable expense and delay.
Accounting for shipping and oversized-part fees
Bumpers are large, lightweight, and vulnerable to bending or impact during transit. Packaging quality and carrier charges can make shipping a meaningful share of the purchase. Ask whether the quoted delivery price includes residential service, liftgate service, or other surcharges that may apply.
Local pickup can reduce freight cost and lets you inspect the panel before accepting it. If shipping is unavoidable, photograph the packaging and inspect the corners immediately. Damage discovered after the carrier’s reporting window can be much harder to resolve.
Find reliable PT Cruiser bumpers for sale
The source you choose affects the information available before purchase. Established parts channels may provide catalog fitment, while salvage sellers often provide vehicle-specific photographs and condition notes. Private listings can be convenient, but they usually require more questions from the buyer.
Chrysler and OEM parts sources
Chrysler and OEM-oriented sources are a logical first stop when preserving the original shape and attachment design matters. A Chrysler PT Cruiser bumper listing should still identify the year range, front or rear position, body style, and condition. Confirm whether the part is new old stock, factory original, or simply described as an OEM replacement.
Catalog descriptions can be concise, so compare the part number and photographs with your vehicle. If the source cannot confirm the application, use the VIN and ask for a written answer before ordering. That small exchange can prevent an expensive mismatch.
Salvage yards and recycled-parts marketplaces
Salvage yards can be useful for finding original panels from vehicles with similar specifications. Ask where the bumper came from, whether the donor vehicle was exposed to a collision at that end, and whether the tabs were intact during removal. Many yards can provide photographs or condition grades when requested.
Recycled-parts marketplaces may consolidate inventory from multiple yards, which improves selection but can make descriptions inconsistent. Read the individual seller’s notes, not only the marketplace summary. Check the warranty and return terms attached to that specific listing.
Online aftermarket retailers
Online retailers make it easy to compare materials, finishes, and styling choices in one place. Focus on detailed application data, installation notes, and customer-service contact information rather than the number of product photographs. A retailer that explains whether the bumper is ready for prep and paint gives you a clearer cost estimate.
Before checkout, verify that the part is for the correct bumper position and body style. Save the product page, part number, and stated fitment. Those details are useful if the listing changes or the package contains a different variation.
Private sellers and local listings
Private sellers may offer a painted panel at an attractive price, especially when they are parting out a vehicle. Arrange an in-person inspection when possible and bring photographs of your original bumper for comparison. Do not rely on color alone; inspect the rear surface and mounting points.
For a local purchase, agree on what is included before meeting. Bring suitable padding and enough vehicle space to transport the panel without bending it. A quick inspection is worthwhile even when the price feels low.
Plan the replacement and installation
Replacing a bumper is more manageable when the new part is inspected and test-fitted before paint. The work may involve clips, fasteners, wheel-well liners, grille pieces, and brackets rather than a single visible panel. Set aside enough time to document how the original parts are arranged.
Tools and replacement hardware to prepare
Prepare basic hand tools, trim-removal tools, gloves, lighting, protective padding, and containers for fasteners. Replacement clips and screws are worth having available because old plastic retainers may be brittle or missing. Consult a repair manual or vehicle-specific service information for fastener locations and safety procedures.
Keep the bumper supported while hardware is removed. A second person can help prevent the panel from dragging against the fenders or floor. Organize fasteners by location instead of placing everything in one pile, especially if several trim pieces are being transferred.
Removing the damaged bumper safely
Inspect the surrounding panels before removal and photograph the gaps, grille, lamps, and brackets. Disconnect or protect any components associated with the bumper according to the vehicle’s service instructions, and never force a fastener that may be hiding another attachment point. If the car was in a collision, check for damage behind the cover before deciding what can be reused.
Work slowly around painted edges. Masking nearby panels and using the correct trim tool can reduce fresh scratches. Once the bumper is off, compare its mounting layout with the replacement before throwing anything away.
Aligning the replacement panel
Test-fit the replacement with the main fasteners loosely installed. Check the gaps at the fenders, grille, lamps, wheel openings, and lower edge before tightening anything fully. If alignment is poor, stop and investigate whether the part is wrong, a bracket is bent, or a clip is missing.
Do not paint a custom or aftermarket-style bumper until the fit has been established. Small adjustments may be possible, but forcing a panel into place can stress tabs and create uneven gaps. A patient test fit is cheaper than correcting a finished surface.
When to use a professional body shop
A body shop is the safer choice when the bumper has collision damage behind it, the replacement needs significant reshaping, or the vehicle has sensors or other systems that require careful handling. Professional painters can also assess texture, color matching, blending, and the preparation required by the material. Their estimate may reveal that a seemingly inexpensive part is not economical to install.
Ask for a written estimate that separates the part, preparation, paint, labor, and additional repairs. You can then compare it with the cost of a more complete replacement. For a simple, well-fitting cover, a skilled home mechanic may manage the swap; for uncertain structural or finish work, professional help is money well spent.
Conclusion
Choosing among PT Cruiser bumpers for sale is mainly an exercise in matching the part to the car and the repair to your budget. Verify fitment, inspect condition and mounting points, account for finishing and delivery, and test-fit before painting. Those steps make it much easier to buy a bumper that looks right, installs properly, and does not create an expensive second repair.