Key Takeaways
A used PT Cruiser headlight can be a sensible repair, but only when its fitment and condition are checked carefully.
- Match the headlight to the PT Cruiser’s model year, trim, side, and wiring.
- Inspect the lens, housing, mounting tabs, adjusters, and reflector before paying.
- Compare the complete cost with a new replacement, including shipping and restoration.
- Install the assembly carefully and confirm that the beam pattern is correctly aimed.
- Treat moisture, severe haze, damaged mounts, and weak reflectors as reasons to walk away.
Understand PT Cruiser headlight compatibility
Buying the right-looking lamp is not quite the same as buying the right part. PT Cruiser headlights can vary with model year, body style, trim, and production changes, so a photo alone is not enough to confirm fitment. Before searching for PT Cruiser headlights second hand, record the vehicle identification number, model year, trim, and whether you need the driver- or passenger-side assembly. That information gives you a much better starting point than a vague listing title.
A headlight assembly also has to work with the car’s electrical connections and mounting structure. A part may bolt into place but still have a different connector, bulb arrangement, or adjustment system. Careful matching before purchase is usually easier than returning a bulky, fragile part later.
Match the model year and trim level
Start with the exact model year rather than relying on a broad “PT Cruiser” description. Earlier cars and later facelifted cars may use different headlamp shapes or part numbers, and convertible and hatchback versions should not be assumed to share every exterior component. Trim names can also help narrow the search, especially when a seller has dismantled several vehicles at once.
Ask the seller for the donor vehicle’s year and trim, then compare that information with your registration or vehicle records. If the listing covers a wide year range, treat that as a prompt to verify rather than proof that one assembly fits every car. A photograph of the front of the donor vehicle can help, but the part number remains more useful.
Check left-hand and right-hand fitment
Headlights are side-specific. In the United States, the driver-side assembly is normally the left-hand unit when you are sitting in the vehicle, while the passenger-side unit is the right-hand unit. Sellers sometimes describe sides from their own viewpoint while photographing the car, so repeat the side in plain language before ordering.
Compare the rear of the advertised assembly with your existing lamp. Connector placement, bracket locations, and the shape of the housing can quickly reveal whether a listing is for the opposite side. If you need only one headlight, matching the visible color and finish of the other side may also matter.
Compare OEM and aftermarket assemblies
An original-equipment assembly may offer the closest match to the lamp already on the car, but age and previous repairs still matter more than the label alone. An aftermarket unit can be a practical alternative when its fitment information is clear and its construction appears sound. With a used part, “OEM” does not automatically mean undamaged, and an unfamiliar replacement is not automatically poor quality.
Look at the housing shape, lens contours, connector, mounting points, and adjuster locations. A good listing should show enough of the front and rear to compare those details. Also ask whether the sale includes the complete assembly or only a lens, housing, bulb socket, or partial internal component.
Verify bulb type, wiring, and mounting points
Confirm the bulb specification and connector style before you commit. Two assemblies can look almost identical from the front while using different sockets or wiring arrangements. If your existing lamp has an unusual adapter, damaged wiring, or a modified connector, photograph it and ask the seller to compare it directly.
Mounting points deserve equal attention. Count the tabs and inspect their location against the old unit, including lower brackets that may be hidden in a front-view photograph. The adjustment screws should also be present and intact. A small difference at the rear can prevent the lamp from seating properly, leaving gaps or unwanted movement.
A simple comparison record helps prevent confusion when several listings seem similar:
| Detail to compare | Your vehicle | Used listing | What to confirm |
|---|---|---|---|
| Model year and trim | Registration or records | Donor vehicle details | Same generation and body style |
| Side | Driver or passenger | Seller’s stated side | Left/right description is unambiguous |
| Connector and bulb | Existing socket and plug | Rear photograph or part data | No adapter or wiring mismatch |
| Mounting structure | Tabs, brackets, adjusters | Clear rear and side photos | No missing or repaired attachment points |
This record does not replace a part-number check, but it makes a seller’s answers easier to evaluate. If one key detail remains uncertain, pause the purchase rather than hoping the assembly will be adaptable.
Inspect used headlights before buying
A used headlight should be treated like a functional safety component, not merely a piece of exterior trim. The front lens affects the light that reaches the road, while the rear housing protects wiring and optical parts from water and dirt. Inspecting photographs closely, and examining the assembly in person when possible, can expose problems that a low price conceals.
Ask for clear images in daylight: front, rear, both sides, mounting points, and the inside if the seller can provide it. Blurry pictures or a single image from several feet away are not enough for a confident decision. A careful seller should be willing to answer specific questions about damage, condensation, and previous repairs.
Look for cracks, clouding, and yellowing
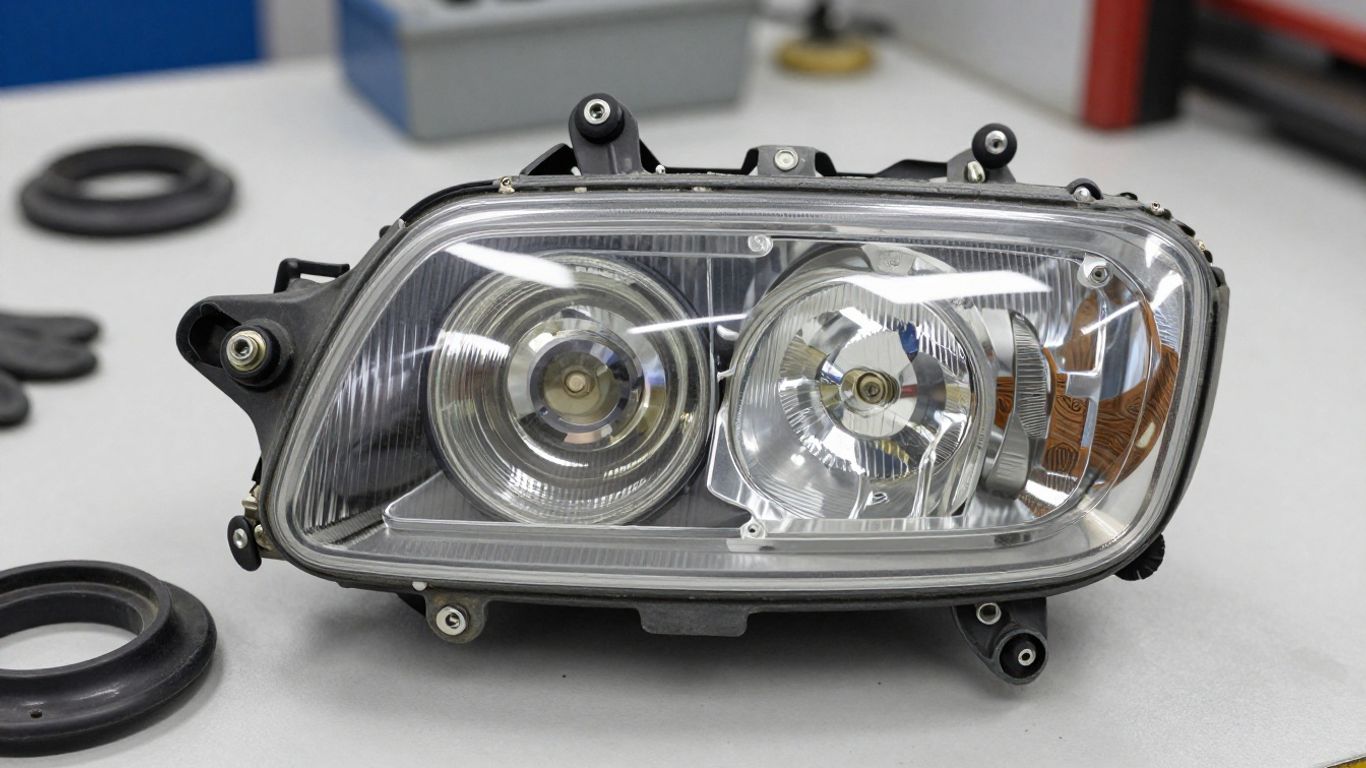
Run your eyes across the entire lens, including its edges and corners. A deep crack can admit water, while a small chip near a mounting point may spread when the assembly is installed. Surface scratches may be acceptable if they are shallow, but long abrasions across the main beam area can scatter light.
Clouding and yellowing vary in seriousness. Mild external haze can sometimes be polished, but heavy oxidation may return quickly or leave the lens uneven after restoration. Look for a sharp difference between the clearer center and opaque edges, which can indicate prolonged exposure or an earlier polishing attempt.
Check the housing for moisture damage
A little temporary mist after a temperature change is different from water collecting inside the lamp. Look for droplets, tide marks, staining, or a cloudy film behind the lens. Rust around bulb sockets and green corrosion on connectors are signs that moisture has been present for more than a brief moment.
Inspect the rear vents and rubber covers as well. Missing caps, torn seals, or blocked vents can explain recurring condensation. If the seller says the moisture is normal, ask whether it clears fully and whether the housing has been tested for leaks. A used assembly with an unresolved water path is usually a false economy.
Examine tabs, brackets, and adjusters
Mounting damage is one of the easiest defects to miss in a front-facing photograph. Check every upper and lower tab for breaks, glue repairs, drilled holes, or stress whitening in the plastic. A repaired tab may hold temporarily but still allow vibration or leave the lamp out of alignment.
Turn your attention to the adjusters. Their screws should be present, accessible, and not visibly stripped. If an adjuster is broken, the lamp may fit physically while being impossible to aim correctly. Ask for close-ups of the rear corners and any bracket that is not visible in the main image.
Confirm the lens and reflector condition
The reflector and projector or reflector bowl, where fitted, determine how effectively the bulb’s light is directed. Examine the inside through the lens for peeling, discoloration, burnt areas, or a dull metallic finish. A clean outer lens cannot compensate for an internal reflector that has deteriorated.
Check the bulb socket and surrounding plastic for heat damage. Darkened areas, melted edges, or brittle wiring suggest that the assembly has experienced excessive heat or a poor connection. Optical condition matters as much as fitment, because a lamp that bolts on but produces a weak or scattered beam is not a successful repair.
If the seller cannot show the reflector or rear housing clearly, ask directly whether the assembly has internal damage. Their answer, and whether they provide a return option, should influence the price you are willing to pay.
Find reliable second-hand PT Cruiser headlights
The best source is not always the listing with the lowest number. A dismantler may provide a donor vehicle record and standardized photos, while a private seller may know the lamp’s history but have limited technical information. Recyclers and salvage yards can also vary widely in how carefully they grade cosmetic and structural condition.
Use several sources to understand the normal range for the part, then judge each offer by the evidence supplied. Reliable purchasing is mostly a process of reducing unknowns: identify the part, inspect it, verify the seller, and keep a way to recover your money if the item is materially different from its description.
Compare salvage yards, marketplaces, and recyclers
Salvage yards often organize parts by donor vehicle and may be able to confirm the year, trim, mileage, and side. Their inventory can be inconsistent, but the description may be more structured than a casual private listing. Vehicle recyclers sometimes grade parts and photograph damage, which makes comparison easier.
Marketplaces can offer more choice and quicker price comparisons, though descriptions may be incomplete. Read the seller’s other listings and feedback for clues about packaging, accuracy, and how disputes are handled. Do not assume that a professional-looking page guarantees that every used assembly has been tested.
Review seller photos and vehicle history
Photos should show the exact part being sold, not a generic catalog image. Look for consistent lighting and details that match across images. A photograph of the assembly beside its label or part number is especially useful, as is a shot of the donor vehicle’s front end.
Ask whether the vehicle was involved in a front-end collision. A headlight removed from the opposite side of a damaged corner may be fine, but impact can also distort brackets or create hairline cracks. Flood exposure, fire, and prolonged outdoor storage are more serious concerns because they can affect wiring and internal surfaces even when the lens looks clean.
Ask for the part number and fitment details
Request the complete part number exactly as printed or molded on the assembly. Compare it with a trusted parts catalog, repair reference, or the number on your existing lamp. Suffixes can matter, so do not discard the final letters or assume that a similar-looking number is interchangeable.
Ask concise questions: Which side is it? What year and trim supplied it? Is it complete? Are the tabs and adjusters intact? Does it include bulbs, sockets, or rear covers? Written answers create a useful record if the part arrives with a defect that was not disclosed.
Evaluate return policies and buyer protection
Read the return terms before purchasing, especially for an item described as “as-is.” Check who pays return shipping, how many days you have to report a problem, and whether the seller excludes cosmetic or electrical defects. Photograph the package and assembly as soon as it arrives, before attempting installation.
Buyer protection is most useful when the listing itself is specific. Save the original description, photos, messages, and part number. If the assembly is cracked, incomplete, or the wrong side, those records make a factual claim easier to support. A modestly higher price with a clear return policy may be safer than a bargain that leaves no practical remedy.
Judge the real cost of a used headlight
The purchase price is only one part of the repair. A used assembly may need cleaning, a bulb, a seal, or a replacement fastener before it can be installed. Shipping can also be significant because headlights need bulky protective packaging, and poor packaging can turn a good part into a damaged one during transit.
Set a ceiling for the complete repair before you buy. Compare the used option with a new replacement of suitable quality, then account for the time and risk involved. This avoids the common trap of saving money on the initial listing while spending more to make the part usable.
Compare used prices with new replacements
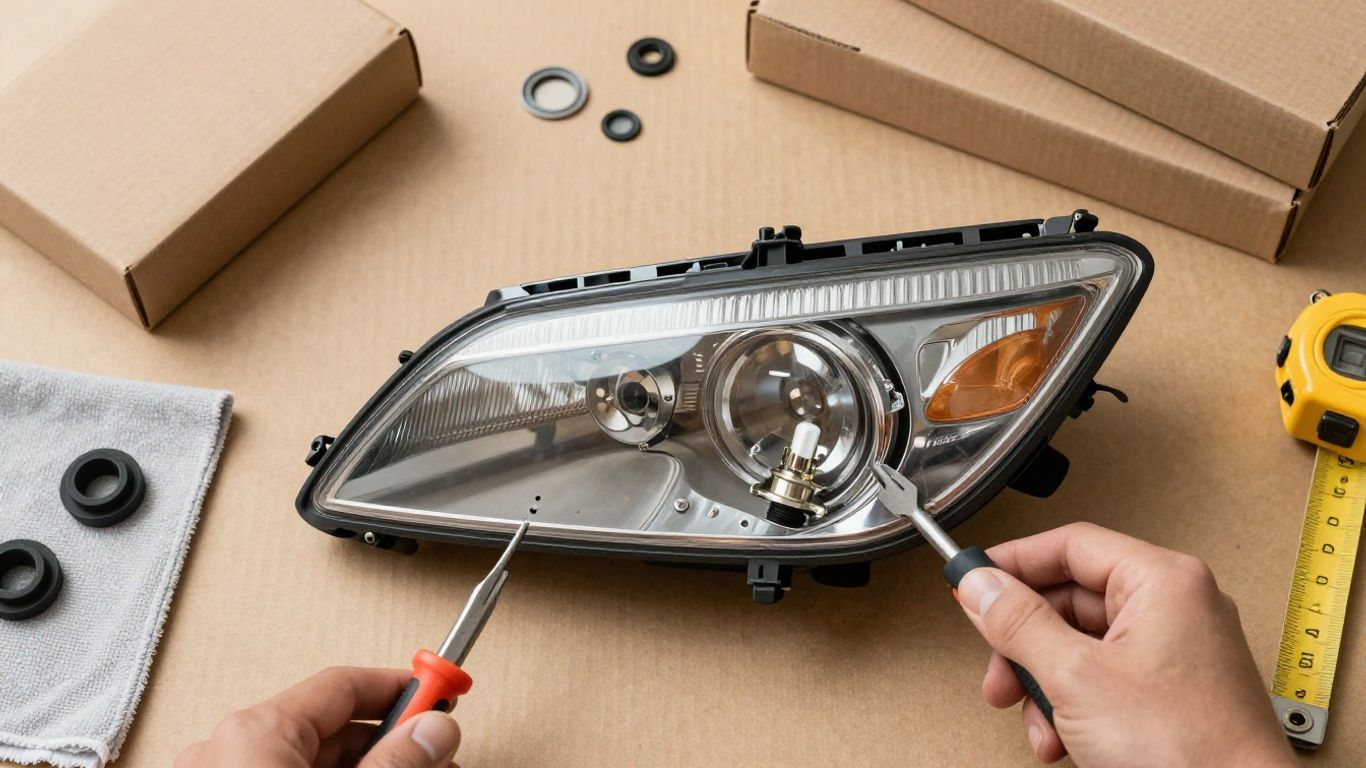
Collect prices for a complete assembly rather than comparing a used lamp with a bare housing or lens. Confirm whether the listed price includes bulbs, sockets, rear covers, and any brackets. A lower price can simply reflect missing pieces that you will have to source separately.
New replacements may offer cleaner lenses and unworn adjusters, while used assemblies can be worthwhile when the original design is hard to find or the visible match matters. The right comparison is not “used versus new” in the abstract; it is the total cost of a usable, correctly fitting assembly with a reasonable chance of lasting.
Include shipping, taxes, and installation costs
Add delivery charges, sales tax, payment fees, and any core or handling charge to the advertised price. Then estimate installation. If you are doing the work yourself, include trim clips, replacement bulbs, gloves, cleaning materials, and time for adjustment. If a shop will fit the part, ask whether alignment is included or billed separately.
Packaging quality deserves a place in the calculation. A seller who uses a rigid box, padding around the lens, and protection for the mounting tabs is reducing the chance of an expensive return. A fragile part sent with minimal protection may be cheap only until it reaches your driveway.
Factor in restoration or polishing expenses
Minor external haze may be repairable, but restoration still has a cost. Professional polishing can be worthwhile when the housing, reflector, and mounts are excellent. A do-it-yourself kit may reduce the cash outlay, though it requires time and a suitable clear protective finish.
Do not price restoration as though it will solve every defect. Polishing cannot repair a cracked lens, restore a burnt reflector, or rebuild a broken adjuster. If the listing already shows deep oxidation and the rest of the assembly is uncertain, the safer choice may be a clearer unit that costs a little more.
Identify signs that a cheap part is risky
An unusually low price deserves questions, not immediate celebration. Missing rear covers, vague fitment, unexplained moisture, repaired tabs, and no photos of the back are all reasons to slow down. A seller who refuses to provide a part number or confirms only that the lamp “came off a PT” is leaving too much unresolved.
Consider the cost of failure. If the assembly arrives wrong, damaged, or impossible to aim, you may pay return shipping, lose work time, and still need another part. The lowest purchase price is sensible only when the condition and remedy are clear.
Prepare for installation and adjustment
Installation is more than swapping one plastic shell for another. The old assembly must come out without damaging surrounding trim or wiring, and the replacement must sit evenly in its mounts. Before starting, compare both lamps on a workbench so that differences in brackets, connectors, and bulb access are found while the car is still intact.
Use the vehicle’s service information for the exact fastener locations and removal sequence. PT Cruiser equipment and trim can differ, so avoid forcing a grille, bumper edge, or connector simply because it appears close to release. Work methodically and keep removed hardware organized.
Gather the required tools and replacement parts
Prepare common hand tools that match the vehicle’s fasteners, along with a trim tool, flashlight, gloves, and a clean cloth. Have replacement bulbs, rubber covers, clips, or fasteners available if the used assembly does not include serviceable ones. A stable work light is useful when checking the rear of the lamp.
You may also need a socket or wrench set, masking tape for marking alignment, and a level surface for beam adjustment. Inspect the replacement before opening the car’s front end. If a tab is broken or the connector does not match, finding out at the workbench is far less frustrating than discovering it halfway through removal.
Remove the old headlight safely
Park on level ground, switch the vehicle off, and allow hot bulbs or engine-bay components to cool. Follow the service procedure for disconnecting the lamp and remove fasteners without pulling against the wiring. Release the connector by its locking tab rather than tugging on the wires.
As the old assembly comes free, support its weight and check for hidden clips or brackets. Do not use the old lamp as a template if it has been bent or repaired after an impact. Lay it beside the replacement and compare the mounting points before discarding any useful hardware.
Install the second-hand assembly correctly
Clean the mounting surfaces and inspect the replacement’s sealing edges before placing it in position. Seat the assembly evenly, start all fasteners by hand, and tighten them gradually so the housing does not twist. The lamp should sit flush with adjacent body panels without excessive force.
Reconnect the wiring and confirm that the locking mechanism is fully engaged. Test the low beam, high beam, turn signal, and any other function housed in the assembly before refitting all trim. If a bulb flickers, a connector becomes hot, or the lamp moves when touched, stop and correct the problem rather than covering it with final trim.
Align the beam pattern after installation
Headlight aim should be checked whenever an assembly is replaced, even if the lamp appears to sit in the same position. Park on level ground facing a wall or suitable aiming surface, use the vehicle’s recommended preparation, and mark the original beam references before removal when possible. Keep the car normally loaded and ensure the tire pressures are correct.
Adjust one lamp at a time using the assembly’s adjusters. The low-beam cutoff should be even and appropriately positioned relative to the other side; avoid aiming high enough to glare at approaching drivers. If the beam is irregular or cannot be adjusted, suspect a damaged reflector, stripped adjuster, or poorly seated housing rather than continuing to turn the screw.
After adjustment, take a short night drive on a quiet road and recheck the fasteners later. The final test should confirm useful illumination without dazzling other road users.
Maintain second-hand headlights after installation
A used assembly can continue serving well when its seals, vents, lens, and mounting points are kept in good condition. Check it after the first rain and again after washing the car. Early inspection catches a loose cover or leaking seam before moisture reaches the connector and reflector.
Maintenance should be gentle. Harsh abrasives, unsuitable solvents, and aggressive pressure washing can damage the lens or push water past a seal. Keep notes about bulb replacement and alignment so a gradual change in light output is easier to identify.
Prevent moisture and condensation problems
Inspect the rear caps, vents, and seams for gaps or damage. A small amount of mist may clear as the lamp warms, but repeated droplets, standing water, or interior staining calls for investigation. Check that bulbs are seated correctly and that rubber covers have not folded or torn during installation.
If moisture returns, dry the assembly only in a safe, controlled way and find the entry point rather than sealing every vent. Vents are part of the housing’s pressure and moisture management. A damaged seam or warped cover may require repair or replacement of the assembly.
Restore light output from minor lens haze
Wash the lens first with automotive-safe soap and water, then inspect it when dry. Light surface haze may respond to a proper plastic-lens restoration process, followed by a compatible UV-protective finish. Work evenly across the surface so that one polished patch does not leave a distorted transition.
Do not polish aggressively when the lens is cracked or the haze appears to be inside. Internal damage needs a different remedy, and removing more outer material will not restore a deteriorated reflector. After restoration, compare both beams at night rather than judging the result by appearance alone.
Replace bulbs and seals when necessary
A new-to-you housing may still contain an old bulb with reduced output or a darkened filament area. Replace bulbs in matching pairs when practical, using the correct specification and avoiding contact with bulb glass where the design requires it. Confirm that the socket locks securely and that the wiring is not stretched.
Replace torn rear covers and flattened seals promptly. These small parts protect the assembly from water and dust, and they are often cheaper than dealing with a corroded connector. After servicing, test every lamp function and look for condensation over the following days.
Know when to replace the assembly again
Replacement becomes sensible when the lens has a serious crack, the housing repeatedly fills with water, the reflector is peeling or burnt, or the adjusters can no longer hold the beam. A headlight that cannot be aligned safely has reached the end of its useful life even if it still illuminates.
Also reassess an assembly that has needed repeated temporary repairs. Add up polishing, seals, bulbs, replacement tabs, and wasted labor. When those costs approach another sound assembly, choosing a better replacement can provide more dependable lighting and fewer interruptions.
A headlight is only a successful repair when it fits securely, stays dry, and puts light in the right place.
That standard is more useful than judging the part by clarity or price alone. Recheck the beam after any collision, mount adjustment, or work that changes the front end.
Conclusion
Choosing PT Cruiser headlights second hand is mainly an exercise in verification: match the exact application, inspect the complete assembly, calculate the finished repair cost, and protect the result with careful installation and alignment. A patient inspection can turn a used part into a practical repair, while a rushed bargain can create poor lighting, water damage, and another purchase soon after.