Key Takeaways
Finding the right used Chrysler bumpers takes more than matching a make and a model. Confirm the exact year, bumper position, included components, condition, and final installation cost before committing.
- Match the bumper to the exact model year, body style, trim, and front or rear position.
- Clarify whether the listing includes only a cover or a more complete bumper assembly.
- Inspect plastic, mounting points, sensor openings, brackets, and signs of previous repairs.
- Use the VIN and OEM part number to verify compatibility before purchasing.
- Include shipping, paint, installation, return conditions, and missing components in the real cost.
Identify the correct Chrysler bumper for your vehicle
A bumper can look nearly identical to another one and still fail to fit correctly. Model year, body style, trim, lighting equipment, and sensor provisions can all change the shape or mounting details. Start with the vehicle identification number and the original part information, then use listing photos as a second check rather than the only evidence. That extra care is especially useful when searching for used Chrysler bumpers across several sellers.
Match the bumper to the model and model year
Begin with the complete vehicle description: model, model year, engine where relevant, body style, and trim. A bumper listed for a Chrysler 300, for example, may not suit every year or equipment package of that model. Compare the contour around the grille, headlamps, lamps, and lower openings with your existing bumper. If the seller provides a donor vehicle or stock number, save those details before asking follow-up questions.
Confirm front or rear bumper fitment
Front and rear bumpers are not interchangeable, even when they come from the same vehicle. The front assembly may accommodate grille openings, headlamp washers, fog lamps, or forward sensors, while the rear may include reflector cutouts, exhaust reliefs, or parking sensors. Make sure the listing states the position clearly and do not rely on a photograph taken from an angle that hides the openings.
Distinguish bumper covers from complete assemblies
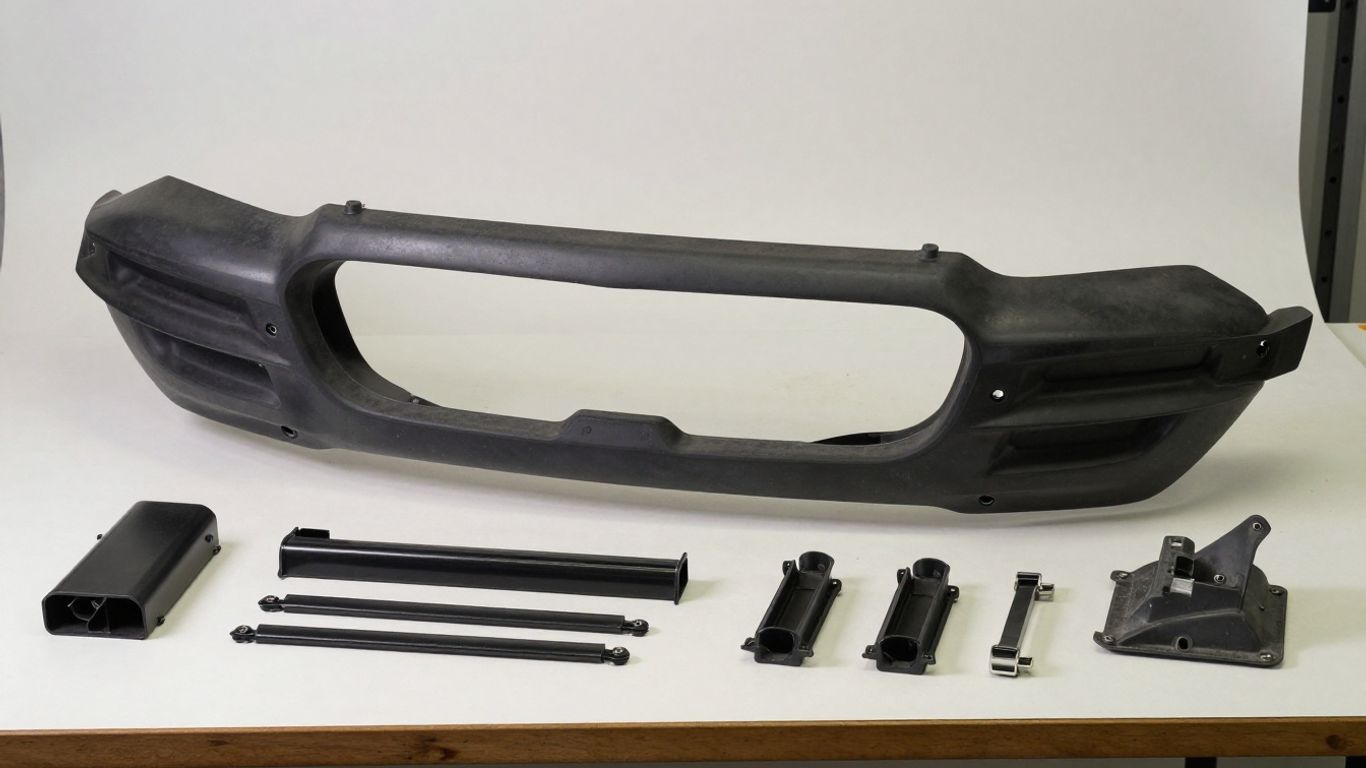
The word “bumper” can describe the painted outer cover, the reinforcement behind it, or a group of parts sold together. A cover is usually the visible skin, while a complete assembly may include absorbers, brackets, grilles, lamps, or sensor hardware. Ask for an itemized description before comparing prices, because two listings with similar titles may contain very different amounts of usable equipment.
Check trim levels, body styles, and special editions
Trim and body style differences often appear around the lower grille, fog light openings, exhaust cutouts, and decorative inserts. Special editions may use unique fascias or mouldings that are not obvious until the bumper is placed beside the original. Send the seller clear photographs of your vehicle’s front or rear end and ask whether the listed part came from the same body configuration.
Understand the parts included with used Chrysler bumpers
A replacement can be inexpensive and still require several additional parts before it is ready to install. Used assemblies may retain some original brackets and hardware, but the contents vary by vehicle and seller. Read the description carefully, then request photographs of the front, rear, inside, and mounting edges. Knowing what is actually included prevents a promising purchase from turning into a second parts hunt.
Compare bumper covers, reinforcements, and impact absorbers
The cover provides the visible shape, while the reinforcement and impact absorber sit behind it and perform different structural or energy-management roles. Some listings include only the cover; others include the backing pieces or a complete assembly removed from a donor vehicle. Check whether the reinforcement is straight and whether the absorber is cracked, crushed, or missing before assuming the listing is ready to bolt on.
Check for grilles, brackets, fog light openings, and sensors
Look closely at every opening and attachment area shown in the photographs. A bumper may have the correct overall shape but lack a grille insert, fog lamp bezel, tow-hook cover, parking sensor holder, or side bracket. These smaller pieces can be costly or difficult to source later, particularly when the part is from a less common trim level.
Determine which hardware and mounting pieces are included
Ask whether bolts, clips, retainers, side guides, brackets, and lower shields are part of the sale. Hardware is often absent from used body-part listings because it stayed with the vehicle or was discarded during removal. A seller who can identify the included mounting pieces gives you a clearer basis for judging the price and planning installation.
A simple comparison can make the listing easier to evaluate when several parts appear similar:
| Listing description | Likely included | Questions to ask |
|---|---|---|
| Bumper cover only | Outer painted or unpainted skin | Are grilles, bezels, and brackets included? |
| Cover with accessories | Cover plus selected inserts or trim | Which openings and small parts are complete? |
| Bumper assembly | Cover with some backing components | Is the reinforcement straight and present? |
| Complete used assembly | Multiple attached components | Are sensors, wiring, and hardware included? |
Use the seller’s answer to revise the total cost, not just the advertised price. If several essential pieces are missing, a cheaper assembly may be less practical than a slightly more complete one.
Identify parts that must be transferred from the original bumper
Some components may need to move from your damaged bumper to the replacement. These can include lamps, sensor modules, wiring, grilles, trim, brackets, emblems, and access covers. Before removing the original, photograph how each item is positioned and label loose hardware in separate bags. That preparation reduces confusion when the replacement is a different color or arrives without installation instructions.
Evaluate the condition before buying
Condition is where a used bumper earns or loses its value. A few scratches may be manageable, but hidden cracks, distorted mounting edges, or poorly repaired plastic can create fitment problems after paint. Request high-resolution photographs in natural light, including the inside surface and all corners. Do not treat a clean front-facing image as proof that the entire part is sound.
Inspect cracks, dents, bends, and stress marks
Look for splits around mounting holes, deep dents near corners, ripples in the plastic, and white stress marks around bent areas. The inside of the bumper can reveal damage that is invisible from the painted side. Compare both corners and the upper and lower edges for symmetry. If the part was removed after a collision, ask whether the damage shown is the reason it was replaced or merely a cosmetic issue.
Look for repaired plastic, paint damage, and corrosion
Previous plastic repairs are not automatically a reason to reject a bumper, but their location and quality matter. Uneven filler, rough welds, overspray, peeling paint, and mismatched color may add preparation costs. Metal reinforcements and fasteners should also be checked for corrosion, especially if the vehicle operated in a wet or salted environment.
Check mounting tabs, clips, and sensor openings
Mounting tabs are easy to overlook and difficult to replace cleanly once broken. Ask for close photographs of the wheel-arch edges, lower lip, grille surrounds, and sensor apertures. Confirm that clips are not torn out and that the openings are the correct size and position. A bumper that looks good from the outside can still be unusable if its attachment points are distorted.
Assess whether cosmetic flaws can be repaired
Separate flaws that affect fit from flaws that affect appearance. Light scuffs, shallow marks, and moderate paint damage may be suitable for refinishing, while stretched plastic, missing sections, and badly bent edges may require specialist repair or replacement. A body shop can give the most useful opinion when you provide photographs and the expected paint requirements before buying.
A sound replacement is judged by its mounting points and hidden surfaces as much as by its painted face.
That principle helps keep cosmetic optimism from overriding practical inspection. If the seller will not show the rear of the bumper or answer direct questions about damage, treat the uncertainty as part of the purchase risk.
Verify fitment and compatibility
Fitment should be confirmed through more than a visual comparison. Use the VIN, the original part number, and the vehicle’s equipment list where possible. This is particularly important when a bumper has provisions for electronics or belongs to a facelifted design. A part that can be physically attached may still leave gaps, warning lights, or nonfunctional equipment.
Use the VIN and OEM part number
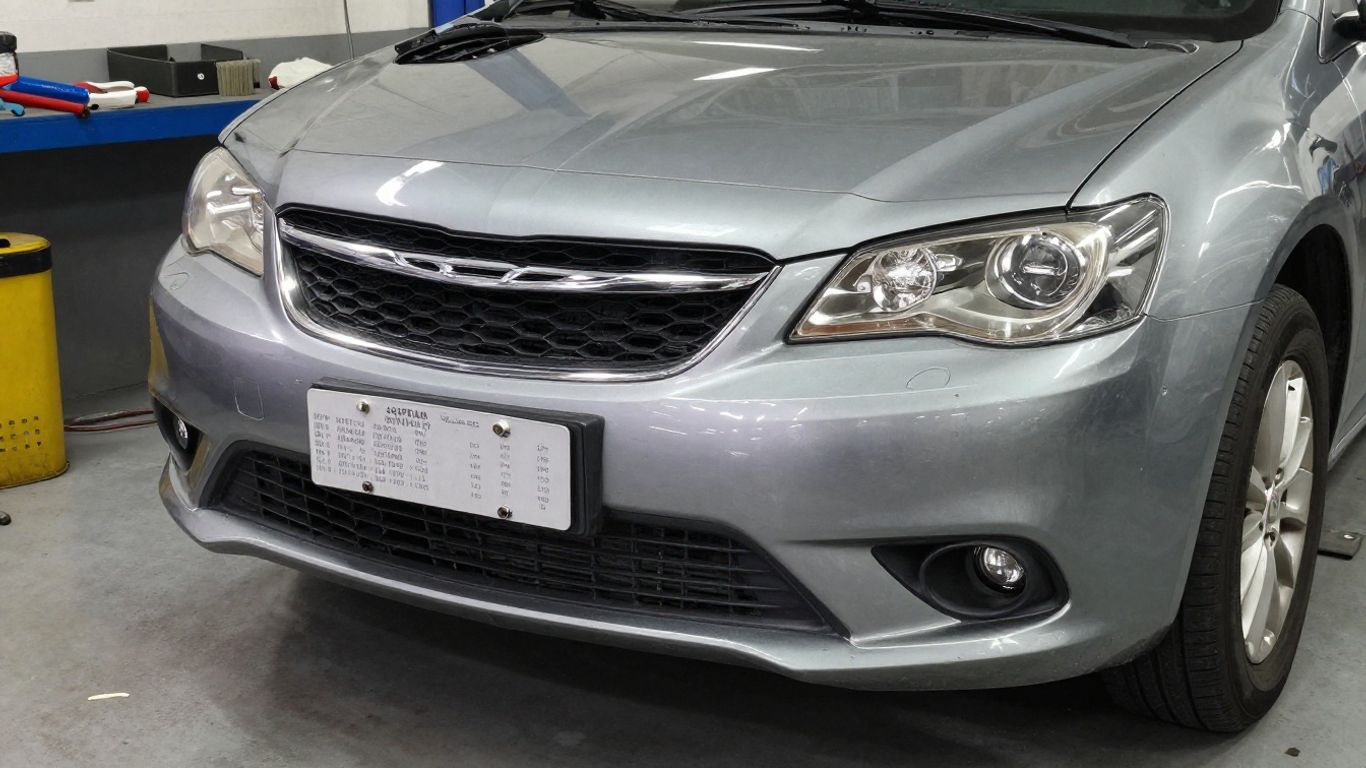
The VIN gives a parts specialist a reliable starting point for identifying the vehicle configuration. Compare the number molded, stamped, or printed on the original part with the number in the listing, allowing for superseded numbers and seller catalog differences. Send both numbers when asking for confirmation, and keep the written response in case the part later proves incompatible.
Compare factory and aftermarket replacement numbers
Factory and aftermarket catalog numbers may not match one another, even when they refer to a replacement for the same application. Check whether the seller’s number is an exact interchange, an updated factory number, or an aftermarket reference. Do not assume that a matching model name alone establishes equivalence. The details around trim, openings, and included hardware still need to agree.
Check compatibility with parking sensors and driver-assistance systems
Sensor-equipped bumpers require particular attention to aperture size, position, brackets, and wiring access. Confirm whether the bumper is prepared for parking sensors or other driver-assistance equipment and whether the sensors themselves are included. If your vehicle has washers, cameras, radar-related fittings, or unusual lamp equipment, mention that before purchase rather than discovering the mismatch during installation.
Confirm differences between facelift and pre-facelift designs
Mid-cycle updates can alter grilles, lamp shapes, lower openings, brackets, and body lines while leaving the model name unchanged. Compare the bumper against photographs of the exact production period, not only the broad model generation. The safest match is one supported by the VIN or an established OEM number, with visual inspection used to catch obvious discrepancies.
Compare prices and seller reliability
The listed price is only one part of the buying decision. A used bumper may need freight, collection, repair, paint, replacement clips, or professional installation. Sellers also differ in how clearly they identify damage and how they handle returns. A reliable listing gives you enough information to calculate the likely finished cost before money changes hands.
Factor in shipping, paint, and installation costs
Large body parts can attract substantial freight charges, and poor packaging can create fresh damage in transit. Add the cost of color matching or refinishing, consumables, replacement hardware, and labor. If the bumper is already painted, allow for the possibility that age and fading will make an exact match difficult. Comparing the complete project cost is more useful than comparing two headline prices.
Compare salvage yards, recyclers, marketplaces, and specialty suppliers
Different seller types provide different kinds of information. A recycler or salvage yard may identify the donor vehicle and offer photographs of the actual part, while a marketplace listing may provide a wider selection but less consistent detail. Specialty suppliers may organize catalog information more clearly. Whichever route you use, judge the individual listing rather than assuming every seller in a category follows the same standard.
Review seller photos, descriptions, and return policies
A strong listing should show the actual bumper from several angles and describe cracks, repairs, paint condition, missing pieces, and part numbers. Read the return policy for exclusions involving freight, painted parts, opened packaging, or incorrect customer-supplied information. Save the listing and all messages until the part has been inspected and accepted.
Watch for low prices that indicate missing components
An unusually low price can reflect a damaged cover, a bare shell, missing brackets, or a part that requires extensive preparation. It may still be worthwhile if you already have the transferable components and access to affordable repair work. Ask what is absent and why the part is priced below comparable listings. A clear explanation is more reassuring than a low figure by itself.
Prepare for installation and long-term use
Good preparation protects the money and time already spent on the replacement. Before final assembly, inspect the part again for shipping damage and compare it with the original. Keep the vehicle’s old components nearby until every transferable item has been accounted for. Careful preparation also makes it easier to resolve a return or insurance issue if the part does not match the description.
Decide when professional installation is worthwhile
Professional help is sensible when the bumper involves sensors, complex brackets, significant plastic repair, or paintwork. A technician can identify alignment problems before the part is permanently finished and may have the tools to restore damaged mounting points. Basic replacement work may be manageable for an experienced owner, but forcing a misaligned bumper into place can create cracks and uneven gaps.
Test-fit the bumper before painting or final assembly
Place the unpainted or unfinished bumper on the vehicle and check the grille, lamps, wheel-arch edges, hood line, trunk or hatch line, and lower attachments. Confirm that every fastener lines up without excessive pressure. Testing first is a small but valuable safeguard because paint and final assembly should come after fitment has been established.
Protect the replacement bumper from future damage
Use correct fasteners and avoid leaving loose wiring or unsupported edges behind the cover. Keep parking sensors and their brackets clean, and address loose undertrays before they pull on the bumper at speed. When parking, allow extra clearance around low curbs and steep driveways, since repeated contact can damage even a properly fitted replacement.
Keep records for warranty, returns, and insurance claims
Save the invoice, part number, donor details, photographs, seller messages, freight records, and installation receipts. Photograph the bumper when it arrives, before opening or discarding packaging, and document any damage immediately. These records make a return request clearer and provide useful evidence for an insurer, repairer, or warranty discussion.
Conclusion
The right used Chrysler bumper is the one that matches the vehicle precisely, includes the components you actually need, and remains sensible after inspection, freight, paint, and installation are counted. Confirm the VIN and part number, question unclear listings, examine hidden mounting areas, and test-fit before final finishing. A slower purchase usually costs less than correcting an attractive but incompatible bargain.