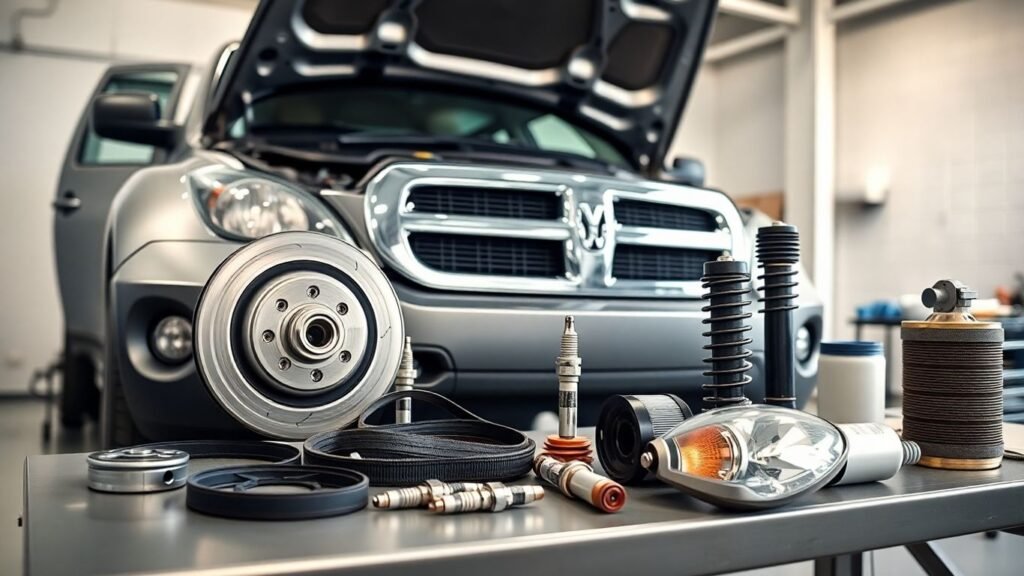
So, you’ve got a Dodge Nitro and you’re looking to keep it running smoothly or maybe even give it a little upgrade. Finding the right Dodge Nitro parts can feel like a puzzle sometimes, with so many options out there. Whether you’re dealing with a specific issue, getting ready for a season change, or just want to boost its performance, knowing what parts to look for makes a big difference. Let’s break down what you need to know to get your Nitro back in top shape.
Key Takeaways
- Genuine Mopar parts offer factory fit and quality, while aftermarket options can provide cost savings or performance upgrades.
- Regular maintenance is key; focus on cooling systems before winter and brakes/tires before summer for safe operation.
- Common Nitro issues like AC smells or coolant leaks can be fixed with specific HVAC or reservoir parts.
- Performance upgrades for your Nitro can include suspension, brakes, and engine components for better handling and response.
- When buying Dodge Nitro parts online, compare warranties, check seller reviews, and understand shipping policies to ensure a good purchase.
Genuine and Aftermarket Dodge Nitro Parts: What to Choose
Picking parts for a Nitro isn’t just about price. Think about fit, safety, and how the part plays with the rest of the vehicle. Go OEM for fit‑critical and emissions items; reach for reputable aftermarket when you want better performance or a friendlier price.
| Metric | OEM Mopar | Quality Aftermarket |
|---|---|---|
| Typical price vs OEM | 1.0x | 0.6x–0.9x (standard), 1.1x–1.5x (performance) |
| Warranty (typical) | Dealer-backed, often ~12 months | ~12–36 months (brand-dependent) |
| Fit confidence | Very high | Medium to high (brand-dependent) |
| Lead time | Dealer stock or order, 1–5 days | Often stocked online, 2–3 days |
| Emissions/OBD match | Built to factory spec | Varies; look for labeled compliance |
Benefits of OEM Mopar Components
OEM Mopar parts are built to the same spec the Nitro left the plant with. Dimensions, connectors, and materials match, so installation is straightforward and you don’t fight odd brackets or wire lengths. That pays off on items like sensors, TIPM-related components, PCMs, HVAC actuators, and EVAP pieces where a tiny mismatch can trigger warning lights or drivability problems.
You also keep factory ride and cabin feel. Rubber durometers in bushings, motor mounts, and sway bar links are tuned to the Nitro’s weight and geometry, so you won’t get extra vibration or clunks. For wear items like radiators, thermostats, or coolant bottles, the OEM shape and hose routing save time and reduce the chance of a slow leak at a weird seam.
When Aftermarket Upgrades Make Sense
Aftermarket shines when you want more bite, better cooling, or sturdier hardware. Brake kits with performance pads and coated rotors can shorten stops and resist fade on long downhill drives. Heavier-duty shocks and struts calm body motion with a small trade in ride softness, which feels good if you tow or carry gear. Stainless exhaust sections and higher‑flow intake tubes can sharpen throttle response, as long as they’re built well and don’t mess with sensors.
Electronics are where you should be picky. Cheap ignition coils, O2 sensors, and throttle bodies can run fine for a week and then start misfiring or set codes. If you go aftermarket on electronics, stick to known brands, look for clear specs, and read the warranty fine print. For hardware like wheel bearings, look for load ratings, proper seals, and a hub with accurate ABS tone ring spacing so your traction control stays happy.
How to Verify Fitment for Your Trim
Start with the VIN. It locks down year, engine (3.7L vs 4.0L), 2WD vs 4WD, and key packages like tow or heavy‑duty cooling. The Nitro had running changes across model years, so a part that “fits 2007–2011” may still need the right build date or suffix code. Match the Mopar part number when you can; the end letters (like AB, AC) matter because they note revisions. For things like radiators, measure core height and inlet/outlet sizes. For sensors and modules, count pins and confirm connector keys. When you’re buying online, use the store’s VIN lookup, then cross‑check against the OE number listed in the description.
Fitment first, price second. If the part number and connector don’t match, don’t force it—send it back before you open the sealed bags.
Essential Dodge Nitro Parts for Seasonal Maintenance

Seasonal upkeep on a Dodge Nitro isn’t fancy work—it’s a handful of smart checks and a few well-chosen parts at the right time. Done before the weather turns, it keeps the SUV starting clean, running cool, and stopping straight when road temps swing.
Cooling System Checks Before Winter
Cold snaps expose weak cooling parts fast. Start with the coolant: verify it matches the factory spec for your model year and test the freeze point with a hydrometer or refractometer. A fresh 50/50 ethylene glycol mix usually protects to well below zero, but confirm the actual reading. Look over the thermostat for proper opening temp, the radiator cap for a solid seal, and all hoses for soft spots or crusty clamps. If the heater blows lukewarm at idle but warms up at speed, you may have a flow issue or air trapped in the system; bleed it properly after any drain. The water pump weep hole should be dry, and the fan clutch (if equipped) shouldn’t freewheel when cold. If you’re considering switching coolant chemistries, do a complete flush—no shortcuts.
| Check | Target/Spec | Notes |
|---|---|---|
| Coolant mix | 50/50 ethylene glycol/distilled water | Test freeze point; don’t guess |
| Freeze protection | About −34°F (50/50) | Verify with a tester |
| Thermostat | ~195°F open temp (typical) | Use OEM spec for your VIN |
| Radiator cap | Correct rating per cap/manual | Replace if it won’t hold pressure |
| Service interval | Often 5 years/100k for older HOAT coolants | Follow your owner’s manual |
Stick to the coolant type your build year calls for; never mix formulas.
Quick tip: pressure-test the system before the first hard freeze. A small seep in October can turn into a no-heat morning in January.
Brake and Tire Prep for Summer Drives
Heat is tough on friction parts, so summer is a good time to refresh the brake system and rubber. Check pad thickness and look for tapered wear that hints at sticky caliper slides. If the pedal feels soft after a few downhill stops, the fluid may be waterlogged—flush with fresh DOT 3 or DOT 4 (not silicone DOT 5). Inspect rotors for deep grooves and verify thickness against the service limit stamped on the hat. On tires, measure tread at multiple points and watch for feathering from poor alignment. Set pressures to the door-jamb sticker when tires are cold, then recheck after a highway run to see if one corner is heating up more than the others. Torque the lug nuts with a wrench, not a guess, especially before long trips with a loaded cargo area or small trailer.
| Check | Target/Spec | Notes |
|---|---|---|
| Pad thickness | Replace around 3 mm remaining | Uneven wear = sticky pins or seized caliper |
| Rotor thickness | Above minimum stamped on rotor | Check runout if you feel pulsation |
| Brake fluid | Replace if moisture >3% or >2–3 years old | Use DOT 3/4 per manual |
| Tire tread | >4/32 in for wet grip; >6/32 in for heavy rain | Measure across the width |
| Tire pressure | As listed on driver’s door label | Set cold; recheck monthly |
Wiper and Cabin Filter Refresh for All Weather
Clear glass and clean cabin air make every drive easier, rain or shine. Swap wiper blades that chatter or leave fine lines—beam-style blades handle wind and slush well, and winter blades won’t ice up as fast. Fill the washer tank with fluid rated for the season; summer bug wash won’t cut it in freezing weather. Make sure the spray pattern hits the sweep of the blades and the pump primes quickly after a few days parked. On many Nitro years, a cabin air filter is either optional or retrofit-only; if your HVAC box has the slot, use a fresh particulate or carbon filter to cut dust and odors. If there’s a stale smell at startup, treat the evaporator with a foaming cleaner and clear leaves from the cowl drains so water doesn’t pool.
| Check | Target/Spec | Notes |
|---|---|---|
| Wiper blades | Replace every 6–12 months or at first streaks | Size by VIN/fitment guide |
| Washer fluid | Rated to local low temps (e.g., −20°F or below) | Don’t mix summer and winter blends |
| Spray pattern | Even fan hitting blade path | Clear clogged nozzles with pin/air |
| Cabin filter (if equipped) | 12 months/12,000 miles | Retrofit kits exist for some years |
Fix Common Dodge Nitro Issues With the Right Parts
Some Dodge Nitro problems pop up so often they feel baked into the truck. A sour A/C smell, odd electrical hiccups, or a slow coolant loss can turn a simple commute into a headache. The fix usually comes down to picking the right part and tackling the root cause instead of chasing symptoms.
Eliminating AC Musty Odors With HVAC Components
Moisture sits on the evaporator core after you park, and that damp spot can grow mildew. Start with a fresh cabin air filter if your Nitro is equipped for one, then treat the evaporator itself with a foaming coil cleaner through the drain tube. Clear the drain so condensate actually leaves the box, or the smell returns in a week. Running the fan for the last minute of your drive with A/C off helps dry the core, but it won’t fix a clogged drain or a filthy filter. If airflow is weak, check the blower wheel for debris and make sure the blend and mode doors are moving; stale air pockets often make odors linger.
If the odor comes back quickly, the evaporator never got cleaned or the drain is still blocked—solve that, and the spray cans finally have a chance to work.
Addressing PCM Updates and Electrical Faults
The Nitro’s powertrain control module can need updated software to smooth shifting, trim false O2 or EVAP codes, or stabilize idle. A dealer or an independent shop with J2534 tooling can load the latest calibration tied to your VIN. If the module itself is failing, a reman PCM pre-programmed to your VIN saves time, but plan on a security handshake during install. Random no-starts, dead batteries, or pumps that won’t quit often trace back to the TIPM’s internal fuel pump relay. A relay bypass kit or a rebuilt TIPM solves that without rewiring the whole truck. Before you buy modules, test the battery and alternator under load and clean the main grounds; low voltage makes good parts look bad.
Stopping Coolant Leaks at the Reservoir
A wet shelf under the hood or a sweet smell usually points to the expansion tank seam or a weak cap. Pressure-test the system cold to about 16 psi and watch the bottle for hairline cracks. Replace the tank and cap together if either one flunks, then refill with the correct HOAT coolant mixed 50/50 with distilled water. Burp the system by idling with the heater on high and topping up once the thermostat opens; trapped air makes the gauge swing and the heater go lukewarm. Never open the cooling system when hot; scalding coolant can spray out. If the new cap vents early, look for a kinked hose or a sticky thermostat creating excess pressure.
| Issue | Key Parts | DIY Time | Typical Parts Cost (USD) |
|---|---|---|---|
| Musty A/C odor | Cabin air filter (if equipped), evaporator foam cleaner, drain grommet | 30–60 min | $25–$70 |
| PCM/electrical glitches | PCM reflash service or reman PCM (VIN-programmed), TIPM fuel pump relay kit, battery | 30–120 min | $0–$500 |
| Coolant leak at reservoir | Expansion tank, pressure cap, small hose/clamps | 45–90 min | $60–$160 |
Match parts to your VIN and engine code, and you won’t be guessing on fitment or chasing the same gremlin twice.
Performance and Towing Upgrades for Your Nitro
I used to think the Nitro just needed more power, but the first time I hauled a small camper up a grade, it became clear that stability, heat control, and braking make or break the trip. Heat shows up fast, the back end can get floaty, and the pedal can go long when things get spicy. If you tow near the Nitro’s rated limit, upgrade cooling and brakes before chasing horsepower.
Heat is the enemy when pulling weight. Keep fluids cool and the truck steady, and the rest of the setup gets easier.
| Upgrade | Typical Cost (USD) | Measurable Change |
|---|---|---|
| Auxiliary transmission cooler | $60–$200 | ATF temps commonly drop 20–40°F on long grades |
| Rear air helper springs (inside coils) | $100–$300 | Sag reduction under tongue load, improved headlight aim |
| Severe‑duty pads + quality rotors | $180–$400 | More consistent stops under load; reduced fade on descents |
| Monotube gas shocks (all four) | $200–$450 | Better control over bounce and trailer sway |
| Cat‑back exhaust + high‑flow panel filter | $300–$700 | Modest throttle response gains; small power bump (often 3–8 hp) |
Suspension and Shock Options for Stability
The Nitro’s front is a strut setup and the rear sits on coils with a solid axle, which means worn shocks show up as bobbing after bumps and a wobbly feel with a trailer. Fresh monotube gas shocks hold damping better when hot, so the ride stays calm after miles of washboard or a steep descent. Twin‑tube units ride soft but heat up faster; if you tow or carry tools in the back often, monotubes are the safer bet for control.
Rear air helper springs slip inside the coils and pump up just enough to level the stance. That takes weight off the bump stops, keeps the driveshaft angle happy, and helps the headlights point where you’re going. Set pressure only as needed; too much air makes the rear skittish on broken pavement. A properly set weight‑distributing hitch can add even more stability when you’re near the factory tow rating, but confirm receiver class and tongue weight limits on your specific Nitro before you add bars.
Brake System Enhancements for Confident Stopping
Stock brakes are fine empty, but long downhill runs with a trailer heat them up. High‑carbon or coated rotors paired with severe‑duty or semi‑metallic pads hold up better when hot than bargain ceramics. Slotted rotors help keep the pad face clean; drilled patterns look nice but can crack if abused under heavy load. Fresh DOT 4 fluid raises the boiling point over old DOT 3, but the key is a full flush so trapped moisture doesn’t undo the upgrade. Stainless braided front lines can steady up pedal feel if your rubber hoses are aging.
Give the new pads a proper bed‑in on a safe road, then torque the lugs evenly. If you still feel shudder, check hub runout and pad deposits rather than blaming the rotor right away. A trailer brake controller is worth its weight when your trailer has electric brakes; split the work and the Nitro stops straighter with less drama.
Intake and Exhaust Additions for Better Response
The 3.7L and 4.0L V6 respond best to simple breathing mods. A high‑flow panel filter in the stock airbox keeps intake temps stable, and a well‑designed cat‑back frees up flow without a drone at highway speed. Gains are modest, but the throttle feels cleaner and the engine doesn’t hunt as much on grades. If you change the muffler, pick one with a resonator or you’ll hear it in the cabin between 1,800 and 2,400 rpm.
Skip gimmicks that swirl air or promise big numbers from a spacer. What actually helps towing is healthy timing components, no vacuum leaks, and a transmission that stays cool. After any intake or exhaust change, give the ECU a short relearn period; a couple of drive cycles with varied throttle usually smooths things out.
Electrical and Ignition Dodge Nitro Parts That Matter
Small glitches in the Nitro’s electrical system can feel random, but the right parts and a few quick tests will save you hours. The charging system, ignition hardware, and the TIPM all play together. If one is weak, the others look guilty. That’s why it pays to test first, then buy parts that match your engine and trim.
Batteries, Alternators, and Charging Health
A Nitro that cranks slow on cold mornings or flickers the lights at idle is begging for a battery and alternator check. Look at age first; most starting batteries fade after a few years, and cold weather exposes that right away. If you run extra lights, a subwoofer, or a trailer brake controller, step up to a higher reserve capacity battery and clean, low-resistance terminals. The alternator should hold steady voltage with and without accessories; big swings usually mean worn brushes, a weak regulator, or a slipping belt. Don’t ignore grounds. A tired engine-to-chassis strap can mimic a dying alternator and make you chase your tail.
Here are quick numbers that help separate healthy from faulty without overthinking it:
| Test Condition | Normal Reading |
|---|---|
| Battery at rest (fully charged) | 12.4–12.7 V |
| Voltage during cranking | Above 10.0 V |
| Engine idling, no accessories | 13.8–14.6 V |
| Idling with lights/HVAC on | 13.5–14.4 V |
| Parasitic draw after modules sleep | 20–50 mA |
Ignition Coils and Spark Plugs for Reliable Starts
Misfire on the Nitro’s V6 usually shows up as a shaky idle, a flashing light on hard climbs, or a raw fuel smell at the tailpipe. The coil-on-plug setup is simple to service, but it’s picky about plug type and gap. Copper plugs fire great but don’t last as long; iridium or platinum go farther if the engine calls for them. Always match heat range and thread reach to your engine code and stick with the gap on the under-hood label. A plug that’s too long can kiss a piston, and one that’s too cold will just foul. If you see oil in a plug well, fix the valve cover gasket first or you’ll cook the new coil boots in a month. Light dielectric grease on the inside of each boot helps the next removal and blocks moisture, while a dry, clean seat and proper torque keep the plug from seizing or blowing out.
Scan for codes before buying parts; a quick read of misfire counters and fuel trims often points straight at the weak cylinder or a bad connection instead of your wallet.
TIPM and Wiring Solutions for Persistent Gremlins
The TIPM is the Nitro’s power distribution brain, and when it acts up you get weird stuff: wipers that swipe once at startup, lamps that won’t listen, or a no-crank that magically fixes itself. Rule out the simple things first. Check the battery negative to body and engine grounds, then look for rubbed insulation where the harness crosses the core support or enters the liftgate and driver’s door. A corroded connector can drop voltage enough to confuse the TIPM. If you do replace the module, match part numbers and build date, and be ready for programming so everything talks nicely again. Used units are tempting, but they can bring along someone else’s problem. When in doubt, test outputs at the TIPM with a meter or a test light, confirm you have good power and ground, and only then commit to a new box. This approach beats swapping parts in the dark and usually fixes the “ghosts” for good.
Buying Dodge Nitro Parts Online With Confidence
Shopping online for Nitro parts can be smooth when you treat it like any other repair: slow down, read the fine print, and keep proof of everything. Always match the part number to your VIN before you click Buy. It takes an extra minute and saves hours of returns and garage time.
Comparing Warranties and Return Policies
A seller’s policy tells you how they handle problems when a part doesn’t fit, shows up damaged, or fails early. Read the return window, restocking details, and who pays return shipping. Warranty length matters, but the process matters more. If the RMA takes two weeks, your Nitro sits.
| Policy detail | Why it matters | Strong policy benchmark |
|---|---|---|
| Return window | Time to inspect and test-fit without pressure | 30–60 days on uninstalled parts |
| Restocking fee | Hidden cost that can wipe out savings | 0–15% with clear conditions or waived if seller error |
| Return shipping | Can double your cost on heavy parts | Prepaid label on defects; fair rates on change-of-mind |
| Warranty length | Signals confidence in the part | 12–36 months typical; lifetime on some wear items |
| Warranty coverage | Avoids surprises on labor and exclusions | Replacement or refund; clear list of what’s not covered |
| RMA speed | Downtime is money and missed trips | Approval within 24–48 hours; refund in 3–5 business days |
If the policy page is vague or buried, take that as a preview of how support will feel later. I’ve learned to screenshot the policy before purchase because sellers update pages and memories get fuzzy.
Spotting Quality Versus Cut-Rate Components
Good parts usually tell their own story. Packaging shows the brand, part number, and where it was made. Product pages list materials, specs, and fitment by year, engine, and trim. Cheap listings lean on blurry photos and a price that feels too good.
A quick way to sanity-check a listing is to confirm the Mopar interchange number against your VIN, then compare the same number across two other retailers. If one site is 40% lower than the rest with no specs or real photos, that gap has to come from somewhere. Real brands publish data like rotor thickness, vane count, coil resistance, or gasket material; vague claims like “premium grade” don’t help when you’re on the driveway with a stuck bolt.
| Signal | Red flag | How to confirm |
|---|---|---|
| Exact part number and VIN fitment | “Universal” or “fits many makes” | Use a VIN lookup and check the interchange list on multiple sites |
| Brand traceability and packaging | Plain box, no stamps or labels | Ask for box and casting photos; look for date codes and markings |
| Published specs and test data | Buzzwords without numbers | Verify measurements, materials, and any certification claims |
| Buyer reviews with vehicle details | One-line reviews with no miles | Read reviews that list model year, engine, and time-in-service |
| Price relative to market | 30–50% below typical without reason | Cross-check with at least two known retailers |
Shipping Speed, Packaging, and Support Expectations
Speed isn’t just the carrier; it’s stock status, pick time, and distance from the warehouse to your driveway. A part in stock two states away often beats an “in stock” item drop-shipped from across the country. Packaging matters too. Electronics like a TIPM or PCM need anti-static protection and firm foam. Rotors need edge guards and tight boxing. Headlights want double-wall cartons. If a seller skimps on packaging, you inherit the headache.
| Part type | Safe packaging checklist | Typical transit time | Pre-checkout confirmations |
|---|---|---|---|
| TIPM/PCM/electronics | Anti-static bag, dense foam, rigid box | 2–4 business days with expedited recommended | Programming needs, core return rules, bench-test proof |
| Rotors/shocks/springs | Pair boxing, edge guards, desiccant | 3–6 business days ground | Actual weight in shipping quote, torque specs link |
| Lamps and grille pieces | Double-wall box, corner protectors | 2–5 business days | Breakage policy, signature requirement |
| Batteries/fluids (hazmat) | Sealed caps, hazmat carton | 3–7 business days ground only | Fresh date code, hazmat fees, no air shipment |
Ask the seller for a quick photo of the packed box before it ships, especially for electronics and lighting. A minute now beats a week of back-and-forth later.
Customer support should be easy to reach and willing to check fitment before you buy. I like stores that put their phone hours on the page and answer emails with real part numbers, not boilerplate. If they can’t help before the sale, they won’t magically improve after one.
Wrapping It Up
So, keeping your Dodge Nitro in good shape doesn’t have to be a headache. Whether you’re dealing with a small issue like a musty AC smell or need bigger parts like suspension components, finding the right stuff is key. Remember to look for quality parts, maybe even OEM if you can, to make sure they fit right and last. It might take a little searching, but getting the correct parts means your Nitro will run better and keep you rolling safely, no matter the season. Happy driving!